

The Singer 640 offered straight stitch and zig zag with full stitch length and stitch width control.

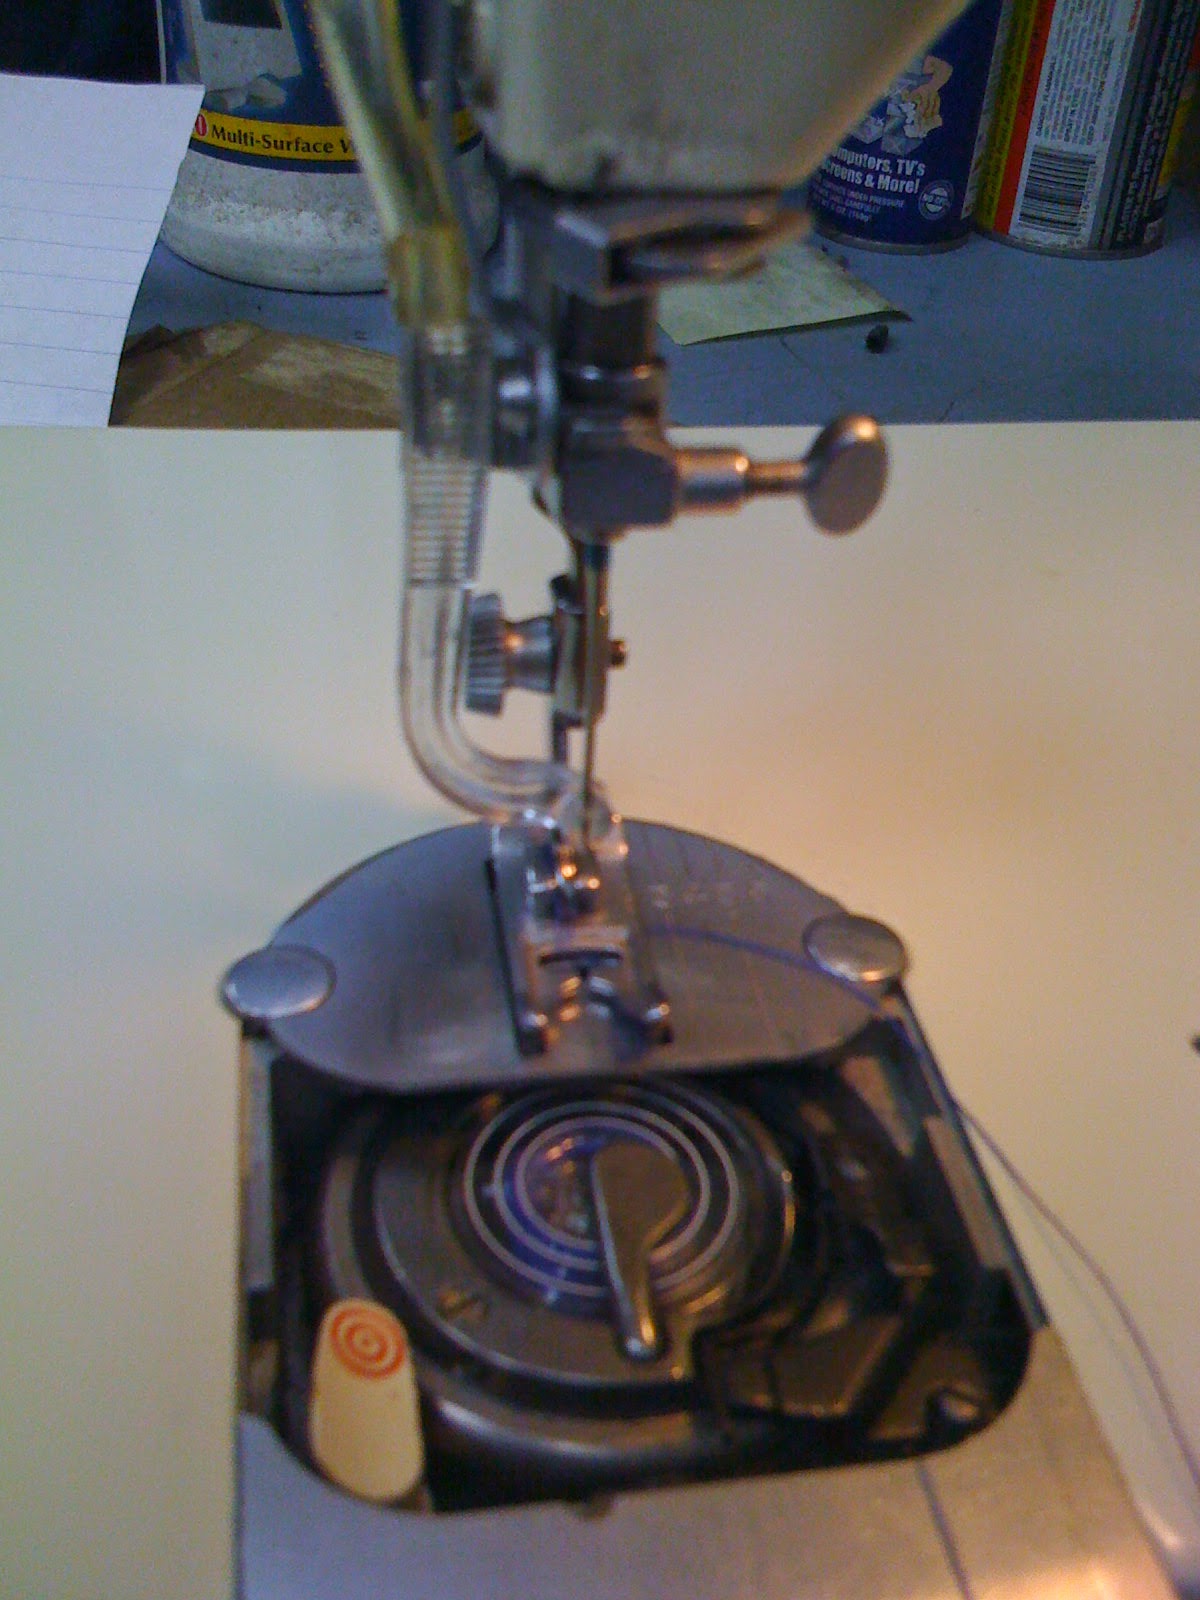
Note the outer silver grey colored circle. This is the hook. Inside the hook you will note the bobbin carrier also silver grey colored circle. Inside the carrier you see the bobbin with two white stripes and a clamp holding it in place. Also notice the black bracket extending from the bottom right. This bracket has a spring on it facing the carrier. This bracket must be properly set to permit the movement of the thread around the bobbin. Too tight and the thread binds up. Too lose and the thread flops around. At the Far lower right is an eccentric used to adjust the bracket. To remove the carrier, the black bracket must be lifted and moved to the right.

The front surface mounted tension assembly is held in place by a set screw under the cover. It may be removed for service, replacement, or repair as needed. Please note inside the tension assembly is a small metal rod about 1/25 inches long. Do not lose or forget to install this rod when servicing the tension assembly. The presser bar lever presses against the pin or rod to open and close the tension assembly. Always thread with presser foot in the up position relieving the pressure on the tensions.

Replacing the gears is pretty easy. Always replace gears in sets. A gear with 2 or more set screws will rest on the round portion of a shaft and may be adjusted around and along the shaft. A gear with 1 set screw sits on the flat of the shaft and may only be adjusted back and forth along the length of the shaft. To remove gears: remove motor mount to the right and anything that prevents moving the shaft to the right. Release guide set screws and move shaft to the right. Remove gears. Replace gears. Reassemble paying very special attention to proper tooth alignment.
The challenge of gear replacement is not removal and replacement of gears. The challenge is resetting all affected settings on the sewing machine: feed, hook, needle bar, and over all balance.
Repairing older sewing machines is fun and rewarding. To learn these special skills, check out Fix Sewing Machines Institute. They offer a comprehensive correspondence program for sewing machine repair plus the top rated all brand sewing machine school. For live classes see http://www.FixSewingMachines.com


